
This guide will help you setup an application in Microsoft Entra that allows RESPONSUM to receive User information from your directory and create User accounts for those users within RESPONSUM. This sync uses the SCIM protocol and is driven from the Entra side, once provisioning is started, Microsoft pushes the users to RESPONSUM on a fixed interval.
NOTE: This sync flow only works with O365 Entra setups. On-premise Active Directory installations are not supported by RESPONSUM.
NOTE: SCIM sync is a separate integration from the “AD sync configuration“, which uses the Microsoft Graph API and pulls users from RESPONSUM’s side. Use one or the other for a given set of users.
NOTE: RESPONSUM will deactivate users earlier added by SCIM sync upon the next sync taking place if they are no longer assigned to the application within Entra.
See it in action
Pre-requisites to get started
- Permissions on the “User Management” or “SCIM configuration” specific sub-module as accountable
- Knowledge of your Microsoft Entra ID environment and an account with elevated rights to allow you to create an “Enterprise application” (Application Administrator, Cloud Application Administrator or Global Administrator)
- An idea of what users/groups you want to import to RESPONSUM to limit the set of users to those required for login with RESPONSUM
Fast-track to Brilliance
- In Entra, navigate to “Entra ID” >> “Enterprise apps” and press “Create your own application”
- Give the application a name and select “Integrate any other application you don’t find in the gallery (Non-gallery)” followed by “Create”
- In the new application, navigate to “Users and groups” and assign the users/groups you want to import to RESPONSUM
- After that navigate to Responsum and select the “Settings” menu in the main menu bar (Gear icon)
- Hover over the sub-section “User management”
- Select “SCIM configuration”
- Give your configuration a name (This can be the same name as your application in Entra ID) and save it first, so an authentication token can be generated
- Edit the configuration again and select “Generate token”
- Copy the token and the “Tenant/Environment URL” for later in step 13 onwards
- Make sure to map all AD properties from users to “User” fields within RESPONSUM
- Optionally map assigned Entra groups onto Organisational units or Roles within RESPONSUM
- Save the configuration
- Back in Entra, navigate to “Provisioning” and select “Connect your application”
- Paste the “Tenant/Environment URL”, set the authentication method to “Bearer authentication” and paste the token
- Test the connection, then press “Create” to create the provisioning configuration
- Press “Start provisioning” on the overview to start Entra to push updates to users and new users to Responsum every 40 minutes.
Step-by-step guidance
Setup of the Microsoft Entra “Enterprise application”
- Navigate to Entra
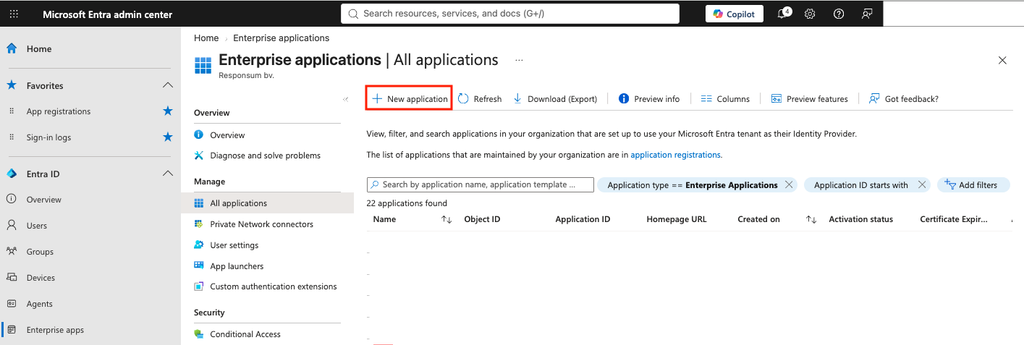
- In the side menu, navigate to “Entra ID” and select “Enterprise apps” followed by selecting “New application”
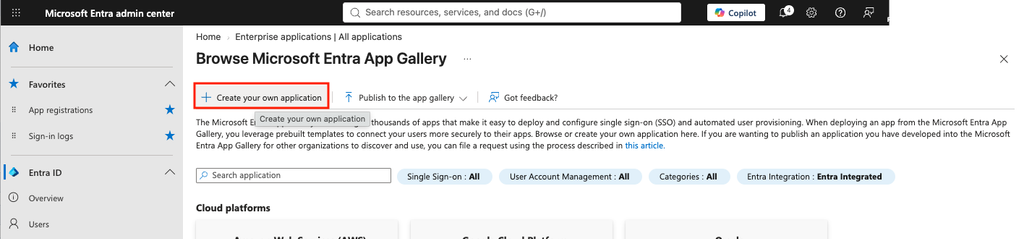
- Press “Create your own application”
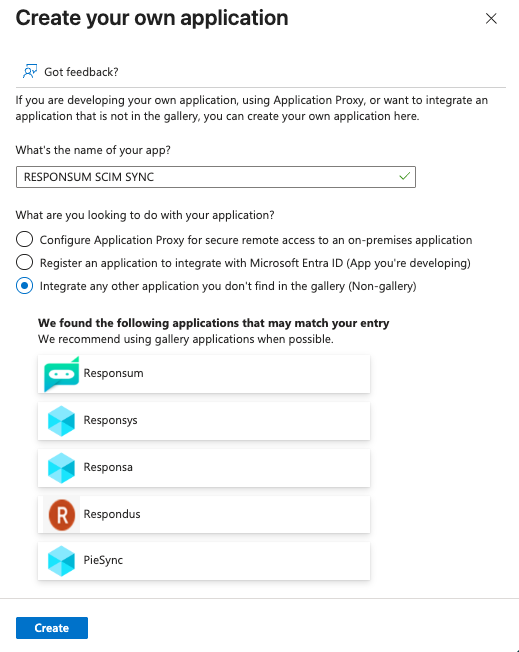
- This application can be named however you like (e.g. “RESPONSUM SCIM Sync”).
- Select the “Integrate any other application you don’t find in the gallery (Non-gallery)” option and create the application
- Next, decide which users reach RESPONSUM. In the application, navigate to “Users and groups” and assign the users and groups that should exist within RESPONSUM.
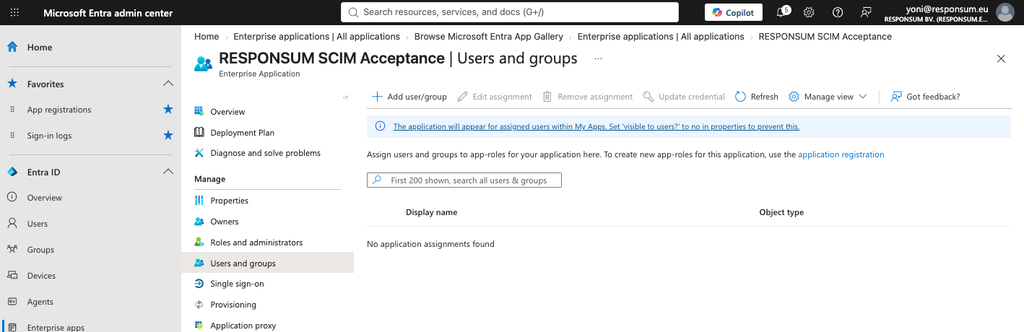

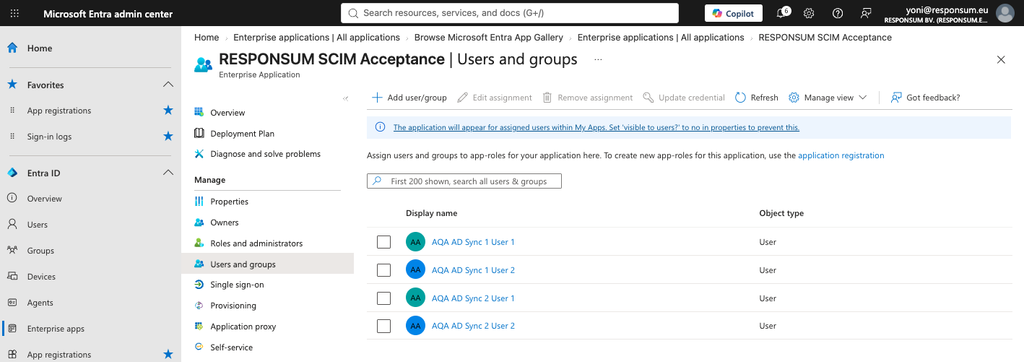
NOTE: Assigning a group provisions its members. Adding someone to that group in Entra will therefore silently create a RESPONSUM account on the next sync, so the group has to be governed accordingly. Whether the group itself also creates something within RESPONSUM depends on the mapping you set later on.
Create the “SCIM configuration” within the RESPONSUM UI
Entra does not issue the authentication token. It stores whatever token you give it and sends it on every request, so the token has to be created within RESPONSUM first together with copying the Tenant/Environment URL.
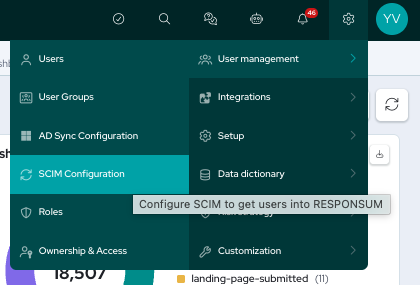
- Select the “Settings” menu in the main menu bar (Gear icon)
- Hover over the sub-section “User management”
- Select “SCIM configuration”
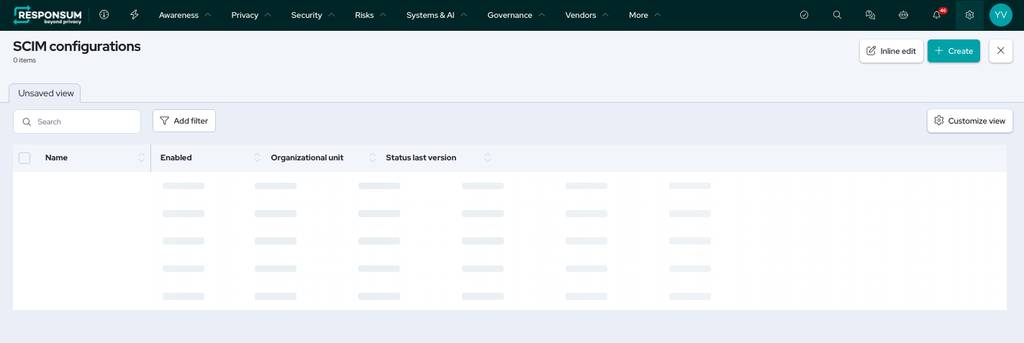
- Press create on the overview page
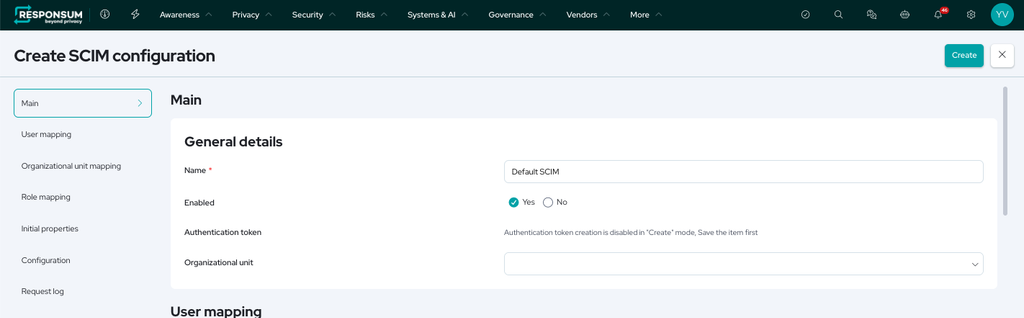
- Give your configuration a name (This can be the same name as your application in Entra ID)
- Save the configuration initially, so that an authentication token can be set — the option is not available on an unsaved configuration
- Edit the configuration again and select “Generate token”
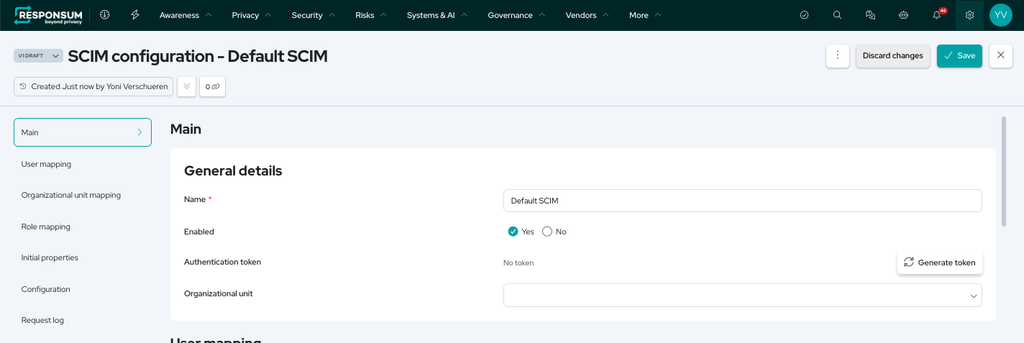
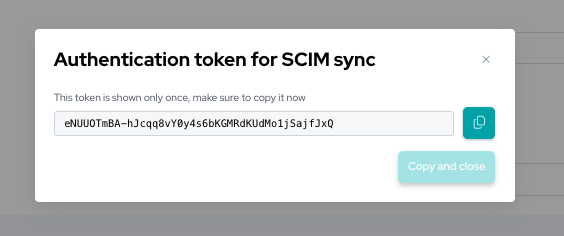
- Copy the token and the “Tenant/Environment URL” and temporarily store them somewhere, as they need to be inputted into Entra in the next step
- Configure the mapping for properties from Entra ID users to “User” fields within RESPONSUM
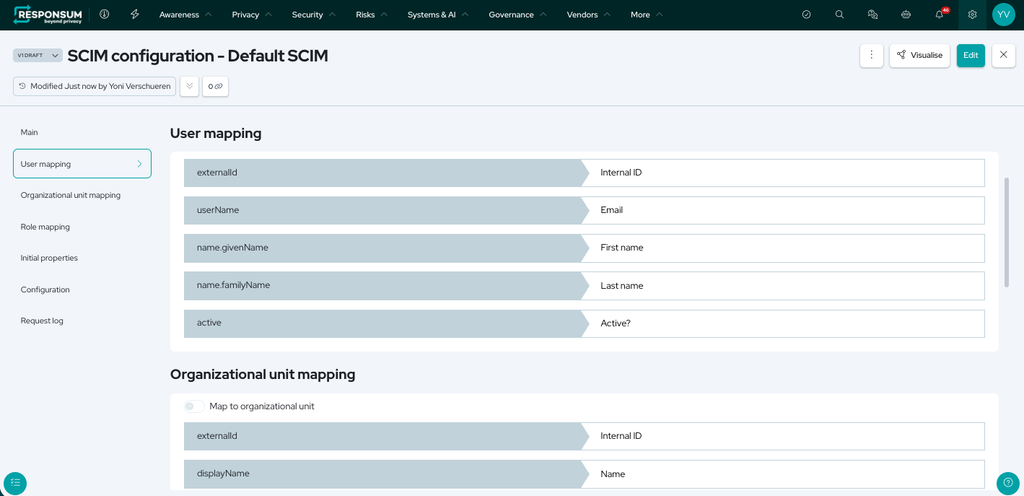
- You can append as many rows for mapping as needed to map all details
- Optionally, setup mapping to Organisational units or Roles within RESPONSUM based on any assigned Entra groups. Decide what an assigned group should produce on the RESPONSUM side — for example, if the Entra group “RESPONSUM” is assigned, whether that should create a matching Organisational unit, grant a Role, or both
- Save the configuration
Connect the application within Entra
- Back in the Entra application, navigate to “Provisioning” and select “Connect your application”
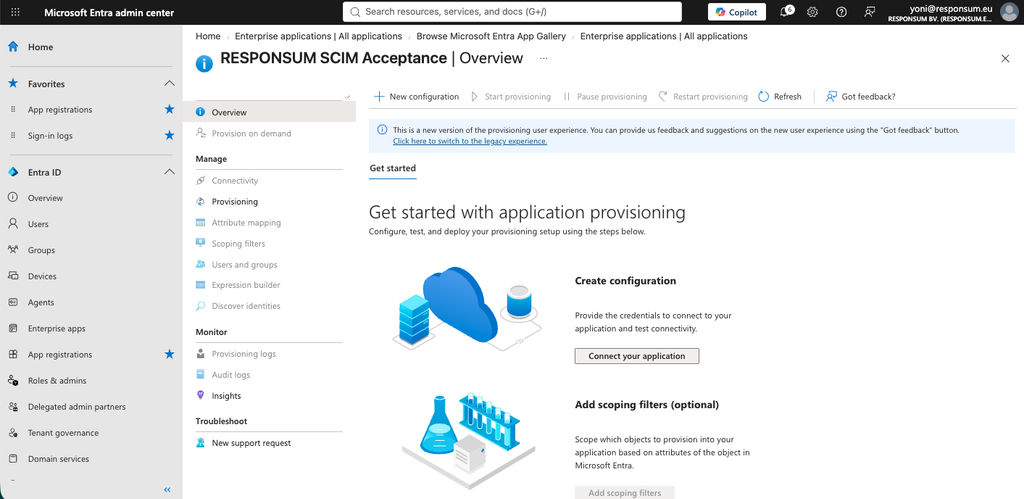
- Paste the “Tenant/Environment URL” you copied from RESPONSUM
- Set the authentication method to “Bearer authentication” and paste the token
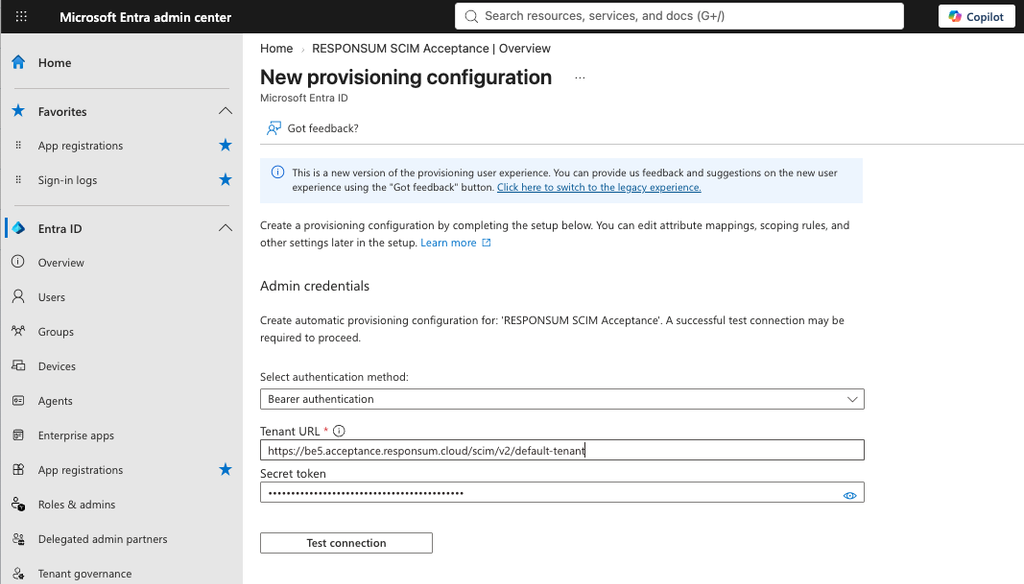
- Test the connection
- If the test succeeded, press “Create” to create the provisioning configuration
A successful test shows up in two places: Entra returns a success message, and the request log within the RESPONSUM SCIM configuration shows the incoming calls.
NOTE: The provisioning configuration now exists within Entra, but it is not yet running. No users are synced until the provisioning is started further down.
Check the scope and test a single user
Before starting the provisioning, use “Provision on demand” within Entra to run a single test user through the whole path. Entra shows the full request and response for that one user, including the exact error if something is rejected. This is far easier to read than a first sync carrying several hundred users, and it catches mapping mistakes while they are still easy to resolve.
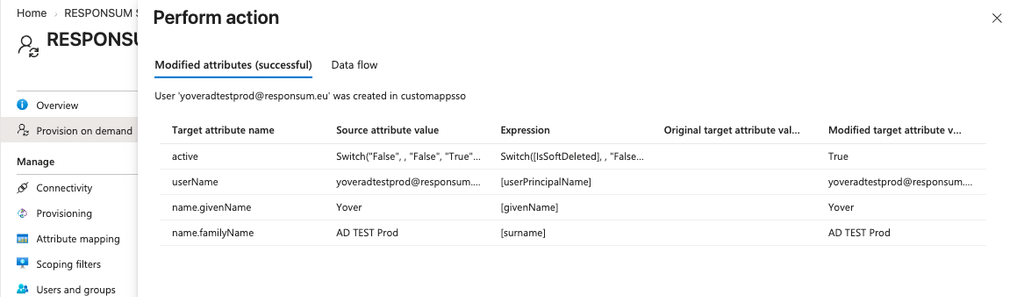
Check within RESPONSUM that the test user was added to the user list (under User management) with the properties you expect.
Start the provisioning
Within Entra, press “Start provisioning”. The initial sync begins shortly afterwards and syncs every assigned user and group, so it takes longer than later runs. After the initial sync, Entra runs an incremental sync roughly every 40 minutes.
More information on the underlying Microsoft service can be found here.
What happens when a user leaves
Three different events within Entra lead to a user being removed from scope, and they behave the same way from the RESPONSUM side:
- The user is unassigned from the enterprise application.
- The user’s account is disabled in Entra.
- The user is deleted from the directory.
In each case Entra sends a deactivation to Responsum, so the Responsum account is disabled and its history is retained. The user can no longer sign in, but records they created, assessments they completed and audit trail entries remain intact and attributable.
If you have any questions related to this guide or way of working, please reach out to support@responsum.eu for assistance.